Step 1: Access the Popup Creation Page
Login to your Popify dashboard and click "Create popup" from the onboarding process. Alternatively, you can navigate to the "My popups" page from the side menu and start creating from there.
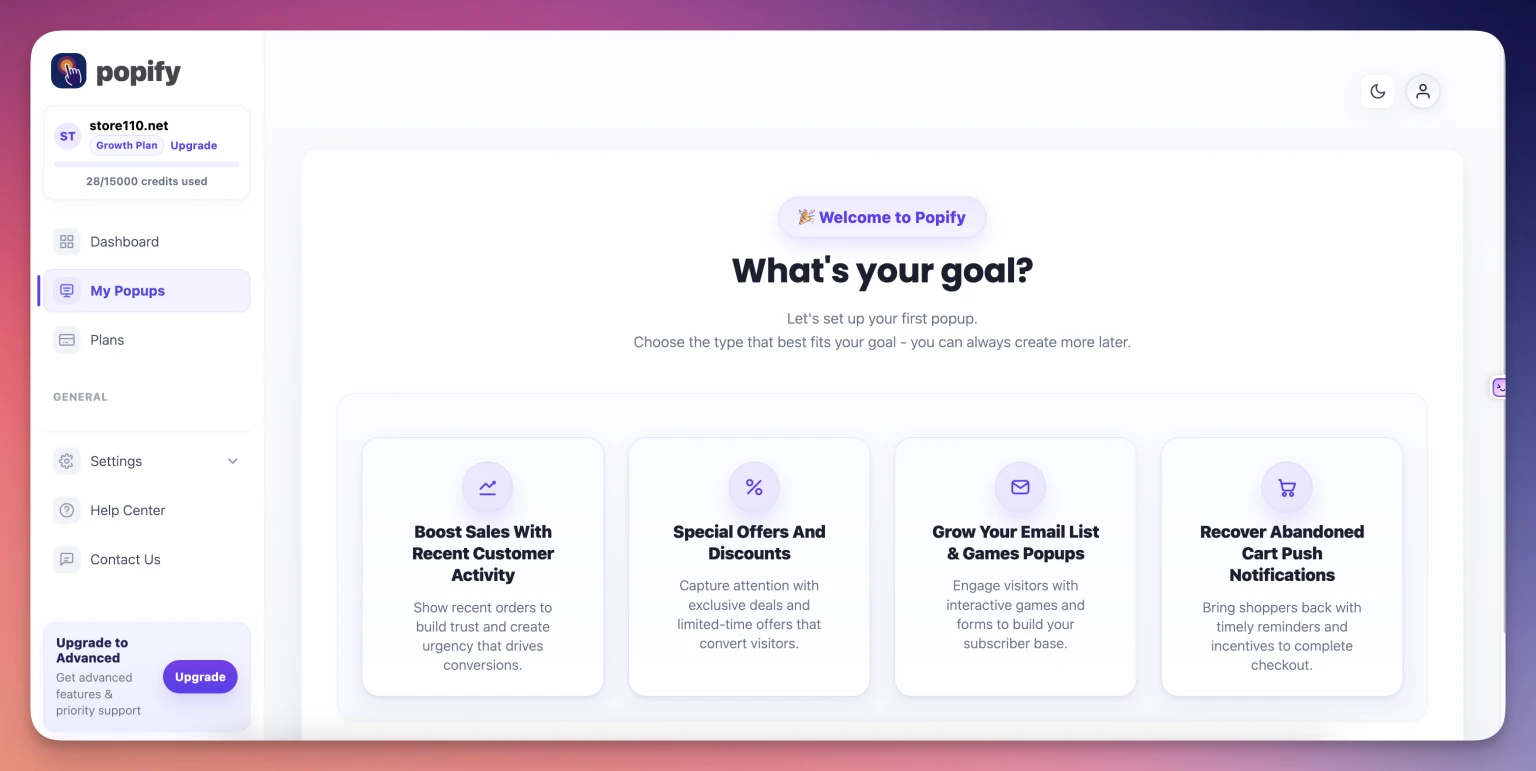
Step 2: Choose Your Goal
On the Add popup page, you'll see various goals designed to help you achieve specific outcomes. Select the goal that best represents what you want to accomplish.
For this tutorial, we'll use "Boost sales with recent customer activity", but feel free to choose any other option that suits your needs.
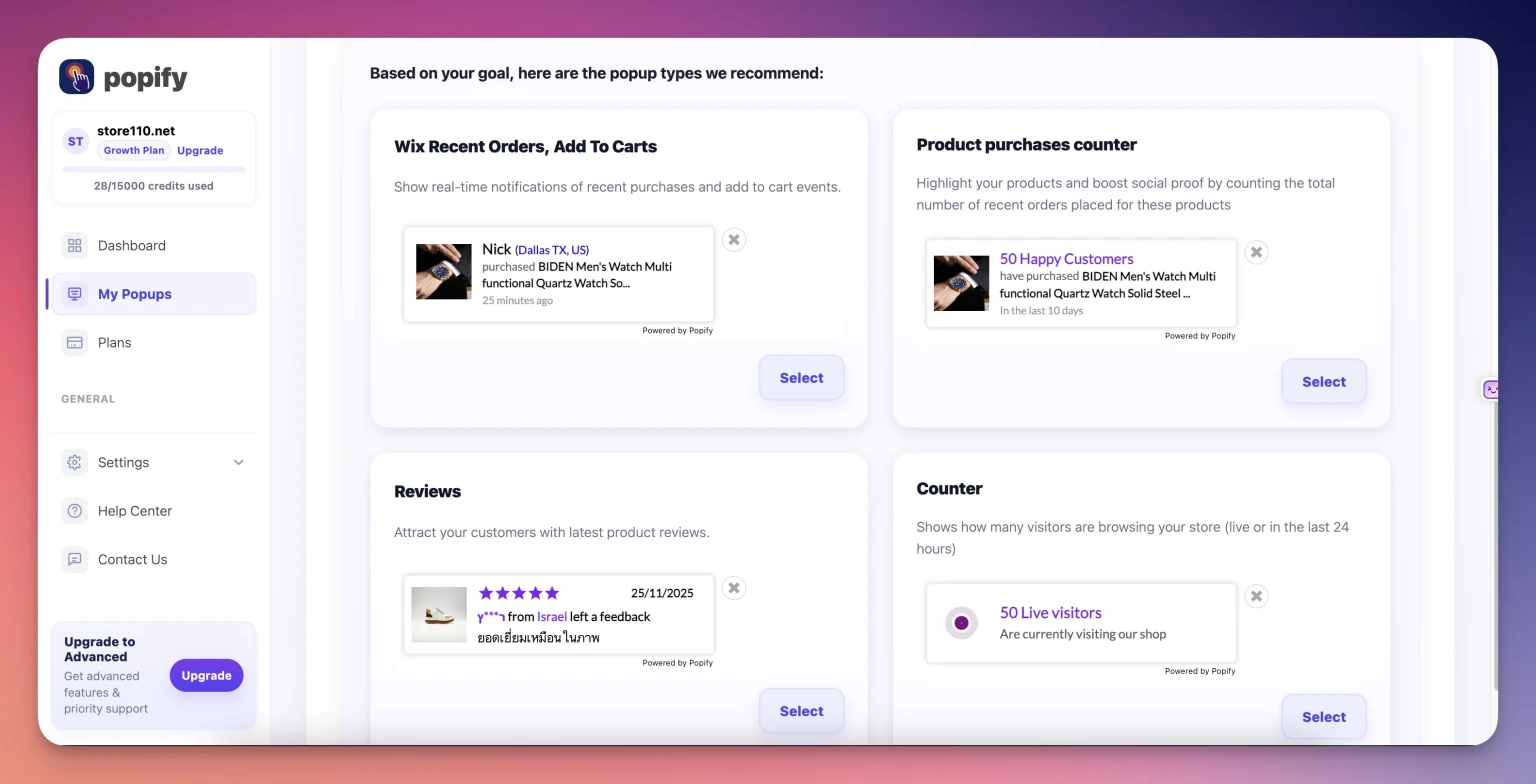
Step 3: Select Your Popup Objective
After clicking on your chosen goal, you'll be prompted to select a specific popup objective. For example, if you selected "Boost sales with recent customer activity," you might choose "Recent orders, add to carts" as your objective.
Select your preferred objective to continue.
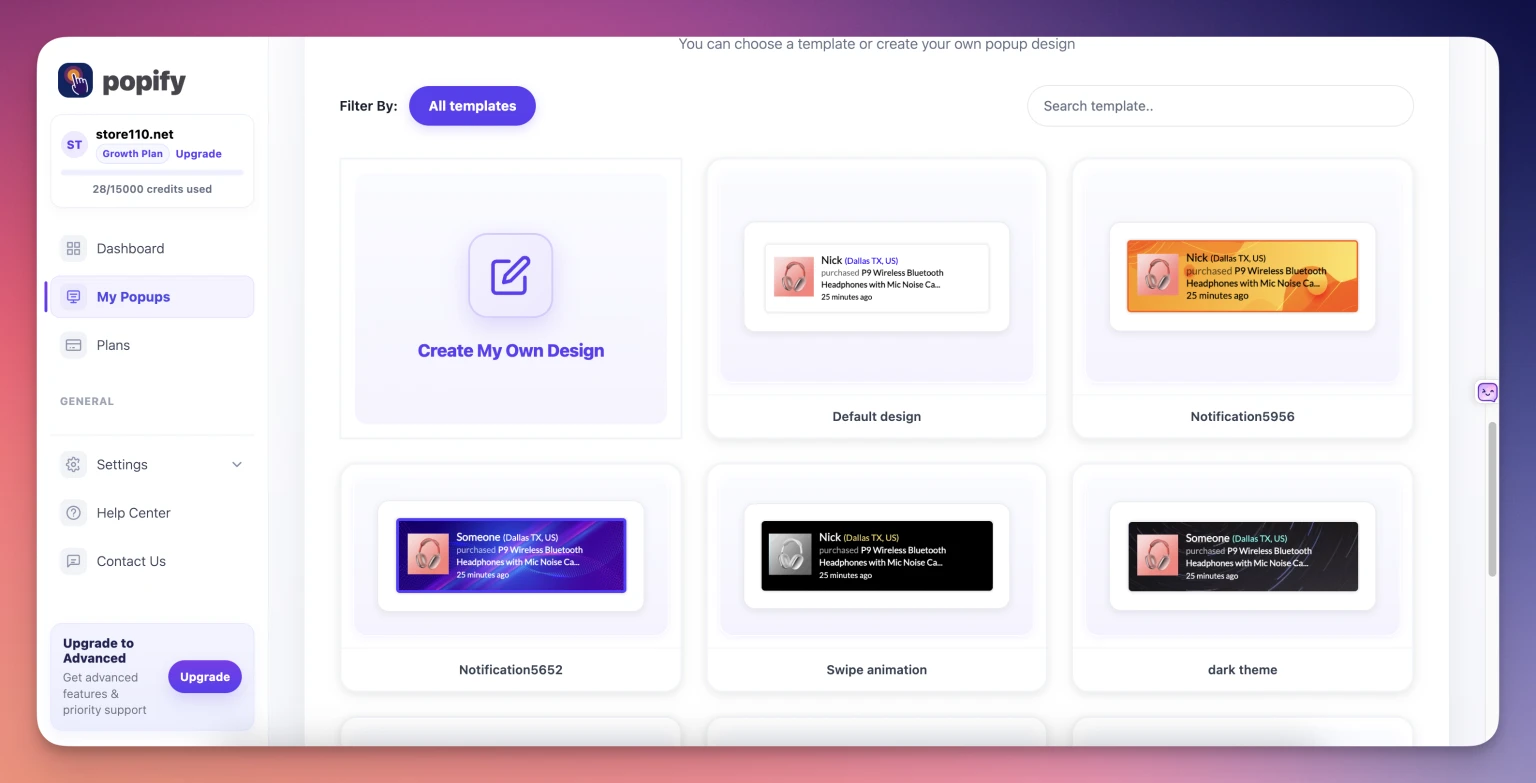
Step 4: Choose a Template or Create Your Own
Once you've selected your objective, the page will scroll down to show available templates. Browse through the options and:
Click on a template that matches your vision, or
Click "Create my own design" to start from scratch
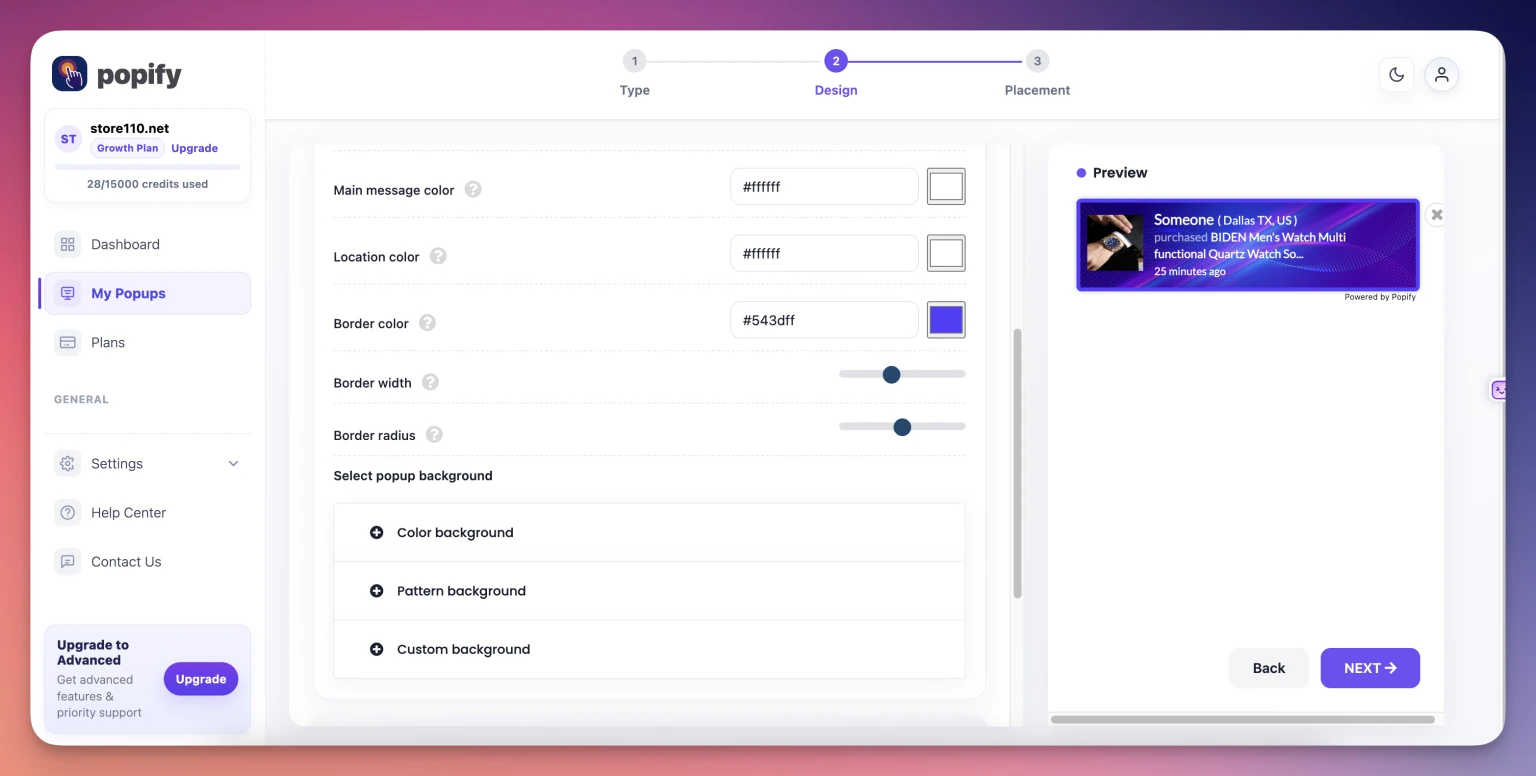
Step 5: Customize Your Popup Design
On the customization page, you can personalize your popup to match your brand:
Select the design shape you prefer
Choose your colors and styling
Set which activity you'd like to display (such as recent orders or add to carts)
Take your time to make it look exactly how you want it.
Step 6: Configure Display Settings and Launch
Click Next to move to the final configuration step. Here you'll need to:
Set which page you want the popup to appear on
Choose the placement on the page (corner, center, etc.)
Click Launch to activate your popup

You're Done!
Your popup will be automatically saved and added to your popups table. To see it in action, simply visit your store and navigate to the page you selected for display.
Pro tip: You can always edit your popup later from the "My popups" page if you want to make changes or test different designs.
Need more help? Contact our support team or explore more tutorials in our help center.